 鴻蒙OpenHarmony【標準系統編寫“Hello World”程序】 (基于RK3568開發板)

編寫“Hello World”程序
下方將展示如何在單板上運行第一個應用程序,其中包括新建應用程序、編譯、燒寫、運行等步驟,最終輸出“Hello World!”。
前提條件
已參考[創建工程并獲取源碼],創建RK3568開發板的源碼工程。
示例目錄
拉取openharmony項目代碼,在代碼根目錄創建sample子系統文件夾,在子系統目錄下創建hello部件文件夾,hello文件夾中創建hello源碼目錄,構建文件BUILD.gn及部件配置文件bundle.json。 示例完整目錄如下。
HarmonyOS與OpenHarmony鴻蒙文檔籽料:mau123789是v直接拿

sample/hello
│── BUILD.gn
│── include
│   └── helloworld.h
│── src
│   └── helloworld.c
├── bundle.json
build
└── subsystem_config.json
vendor/hihope
└── rk3568
    └── config.json
開發步驟
鴻蒙開發指導文檔:[gitee.com/li-shizhen-skin/harmony-os/blob/master/README.md]
請在源碼目錄中通過以下步驟創建“Hello World”應用程序。
創建目錄,編寫業務代碼。
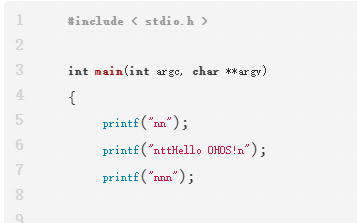
新建sample/hello/src/helloworld.c目錄及文件,代碼如下所示,用戶可以自定義修改打印內容(例如:修改World為OHOS)。其中helloworld.h包含字符串打印函數HelloPrint的聲明。當前應用程序可支持標準C及C++的代碼開發。#include < stdio.h > #include "helloworld.h" int main(int argc, char **argv) { HelloPrint(); return 0; } void HelloPrint() { printf("nn"); printf("nttHello World!n"); printf("nn"); }再添加頭文件sample/hello/include/helloworld.h,代碼如下所示。
#ifndef HELLOWORLD_H
#define HELLOWORLD_H
#ifdef __cplusplus
#if __cplusplus
extern "C" {
#endif
#endif

void HelloPrint();

#ifdef __cplusplus
#if __cplusplus
}
#endif
#endif
#endif // HELLOWORLD_H
新建編譯組織文件。
新建sample/hello/BUILD.gn,創建方法可參考:[模塊配置規則]。
模塊
模塊配置規則
編譯子系統通過模塊、部件和產品三層配置來實現編譯和打包。模塊就是編譯子系統的一個目標,包括(動態庫、靜態庫、配置文件、預編譯模塊等)。模塊要定義屬于哪個部件,一個模塊只能歸屬于一個部件。OpenHarmony使用定制化的Gn模板來配置模塊規則,Gn語法相關的基礎知識請參考[官網手冊]
以下是常用的模塊配置規則:
# C/C++模板
ohos_shared_library
ohos_static_library
ohos_executable
ohos_source_set

# 預編譯模板:
ohos_prebuilt_executable
ohos_prebuilt_shared_library
ohos_prebuilt_static_library

#hap模板
ohos_hap
ohos_app_scope
ohos_js_assets
ohos_resources

#rust模板
ohos_rust_executable
ohos_rust_shared_library
ohos_rust_static_library
ohos_rust_proc_macro
ohos_rust_shared_ffi
ohos_rust_static_ffi
ohos_rust_cargo_crate
ohos_rust_systemtest
ohos_rust_unittest
ohos_rust_fuzztest

#其他常用模板
#配置文件
ohos_prebuilt_etc

#sa配置
ohos_sa_profile
ohos開頭的模板與內建模板的差異主要在于:推薦使用ohos定制模板。
C/C++模板示例
ohos開頭的模板對應的.gni文件路徑在:openharmony/build/templates/cxx/cxx.gni。
ohos_shared_library示例
import("http://build/ohos.gni")
ohos_shared_library("helloworld") {
  sources = ["file"]
  include_dirs = []             # 如有重復頭文件定義,優先使用前面路徑頭文件。
  cflags = []                   # 如重復沖突定義,后面的參數優先生效,也就是該配置項中優先生效。
  cflags_c = []
  cflags_cc = []
  ldflags = []                  # 如重復沖突定義,前面參數優先生效,也就是ohos_template中預制參數優先生效。
  configs = []
  deps = []                     # 部件內模塊依賴

  external_deps = [             # 跨部件模塊依賴定義
  "part_name:module_name",      # 定義格式為 "部件名:模塊名稱"。
  ]                             # 這里依賴的模塊必須是依賴的部件聲明在inner_kits中的模塊。

  output_name = [string]        # 模塊輸出名
  output_extension = []         # 模塊名后綴
  module_install_dir = ""       # 模塊安裝路徑,缺省在/system/lib64或/system/lib下; 模塊安裝路徑從system/,vendor/后開始指定。
  relative_install_dir = ""     # 模塊安裝相對路徑,相對于/system/lib64或/system/lib;如果有module_install_dir配置時,該配置不生效。

  part_name = ""                # 必選,所屬部件名稱
  output_dir

  # Sanitizer配置,每項都是可選的,默認為false/空。
  sanitize = {
    # 各個Sanitizer開關
    cfi = [boolean]               # 控制流完整性檢測
    cfi_cross_dso = [boolean]     # 開啟跨so調用的控制流完整性檢測
    integer_overflow = [boolean]  # 整數溢出檢測
    boundary_sanitize = [boolean] # 邊界檢測
    ubsan = [boolean]             # 部分ubsan選項
    all_ubsan = [boolean]         # 全量ubsan選項
    ...

    debug = [boolean]             # 調測模式
    blocklist = [string]          # 屏蔽名單路徑
  }

  testonly = [boolean]
  license_as_sources = []
  license_file = []               # 后綴名是.txt的文件
  remove_configs = []
  no_default_deps = []
  install_images = []
  install_enable = [boolean]
  symlink_target_name = []
  version_script = []
  use_exceptions = []
}
ohos_static_library示例
import("http://build/ohos.gni")
ohos_static_library("helloworld") {
  sources = ["file"]            # 后綴名是.c的相關文件
  include_dirs = ["dir"]        # 包含目錄
  configs = []                  # 配置
  deps = []                     # 部件內模塊依賴
  part_name = ""                # 部件名稱
  subsystem_name = ""           # 子系統名稱
  cflags = []

  external_deps = [             # 跨部件模塊依賴定義,
  "part_name:module_name",      # 定義格式為 "部件名:模塊名稱"
  ]                             # 這里依賴的模塊必須是依賴的部件聲明在inner_kits中的模塊。

  lib_dirs = []
  public_configs = []

  # Sanitizer配置,每項都是可選的,默認為false/空
  sanitize = {
    # 各個Sanitizer開關
    cfi = [boolean]               # 控制流完整性檢測
    cfi_cross_dso = [boolean]     # 開啟跨so調用的控制流完整性檢測
    integer_overflow = [boolean]  # 整數溢出檢測
    boundary_sanitize = [boolean] # 邊界檢測
    ubsan = [boolean]             # 部分ubsan選項
    all_ubsan = [boolean]         # 全量ubsan選項
    ...

    debug = [boolean]             # 調測模式
    blocklist = [string]          # 屏蔽名單路徑
  }

  remove_configs = []
  no_default_deps = []
  license_file = []               # 后綴名是.txt的文件
  license_as_sources = []
  use_exceptions = []
}
ohos_executable示例
import("http://build/ohos.gni")
ohos_executable("helloworld") {
  configs = []                       # 配置
  part_name = ""                     # 部件名稱
  subsystem_name = ""                # 子系統名稱
  deps = []                          # 部件內模塊依賴

  external_deps = [                  # 跨部件模塊依賴定義,
  "part_name:module_name",           # 定義格式為 "部件名:模塊名稱"
  ]                                  # 這里依賴的模塊必須是依賴的部件聲明在inner_kits中的模塊。
  ohos_test = []
  test_output_dir = []

  # Sanitizer配置,每項都是可選的,默認為false/空
  sanitize = {
    # 各個Sanitizer開關
    cfi = [boolean]               # 控制流完整性檢測
    cfi_cross_dso = [boolean]     # 開啟跨so調用的控制流完整性檢測
    integer_overflow = [boolean]  # 整數溢出檢測
    boundary_sanitize = [boolean] # 邊界檢測
    ubsan = [boolean]             # 部分ubsan選項
    all_ubsan = [boolean]         # 全量ubsan選項
    ...

    debug = [boolean]             # 調測模式
    blocklist = [string]          # 屏蔽名單路徑
  }

  testonly = [boolean]
  license_as_sources = []
  license_file = []                  # 后綴名是.txt的文件
  remove_configs = []
  static_link = []
  install_images = []
  module_install_dir = ""            # 模塊安裝路徑,從system/,vendor/后開始指定
  relative_install_dir = ""
  symlink_target_name = []
  output_dir = [directory]           # 存放輸出文件的目錄
  install_enable = [boolean]
  version_script = []
  use_exceptions = []
}
ohos_source_set示例
import("http://build/ohos.gni")
ohos_source_set("helloworld") {
  sources = ["file"]              # 后綴名是.c的相關文件
  include_dirs = []               # 包含目錄
  configs = []                    # 配置
  public = []                     # .h類型頭文件
  defines = []
  public_configs = []
  part_name = ""                  # 部件名稱
  subsystem_name = ""             # 子系統名稱
  deps = []  # 部件內模塊依賴

  external_deps = [               # 跨部件模塊依賴定義,
  "part_name:module_name",        # 定義格式為 "部件名:模塊名稱"
  ]                               # 這里依賴的模塊必須是依賴的部件聲明在inner_kits中的模塊

  # Sanitizer配置,每項都是可選的,默認為false/空
  sanitize = {
    # 各個Sanitizer開關
    cfi = [boolean]               # 控制流完整性檢測
    cfi_cross_dso = [boolean]     # 開啟跨so調用的控制流完整性檢測
    integer_overflow = [boolean]  # 整數溢出檢測
    boundary_sanitize = [boolean] # 邊界檢測
    ubsan = [boolean]             # 部分ubsan選項
    all_ubsan = [boolean]         # 全量ubsan選項
    ...

    debug = [boolean]             # 調測模式
    blocklist = [string]          # 屏蔽名單路徑
  }

  testonly = [boolean]
  license_as_sources = []
  license_file = []
  remove_configs = []
  no_default_deps = []
  license_file = []               # 后綴名是.txt的文件
  license_as_sources = []
  use_exceptions = []
}
注意 :
- 只有sources和part_name是必選,其他都是可選的;
- Sanitizer配置詳見:[Sanitizer使用說明]
預編譯模板示例
預編譯模板的.gni相關文件路徑在:openharmony/build/templates/cxx/prebuilt.gni。
ohos_prebuilt_executable示例
import("http://build/ohos.gni")
ohos_prebuilt_executable("helloworld") {
  source = "file"                         # 源
  output = []
  install_enable = [boolean]

  deps = []                               # 部件內模塊依賴
  public_configs = []
  subsystem_name = ""                     # 子系統名
  part_name = ""                          # 部件名

  testonly = [boolean]
  visibility = []

  install_images = []
  module_install_dir = ""                 # 模塊安裝路徑,從system/,vendor/后開始指定
  relative_install_dir = ""               # 模塊安裝相對路徑,相對于system/etc;如果有module_install_dir配置時,該配置不生效。
  symlink_target_name = []


  license_file = []                       # 后綴名是.txt的文件
  license_as_sources = []
}
ohos_prebuilt_shared_library示例
import("http://build/ohos.gni")
ohos_prebuilt_shared_library("helloworld") {
  source = "file"                      # 一般是后綴為.so的文件
  output = []
  install_enable = [boolean]

  deps = []                            # 部件內模塊依賴
  public_configs = []
  subsystem_name = ""                  # 子系統名
  part_name = ""                       # 部件名

  testonly = [boolean]
  visibility = []

  install_images = []
  module_install_dir = ""              # 模塊安裝路徑,從system/,vendor/后開始指定
  relative_install_dir = ""            # 模塊安裝相對路徑,相對于system/etc;如果有module_install_dir配置時,該配置不生效。
  symlink_target_name = [string]


  license_file = [string]              # 后綴名是.txt的文件
  license_as_sources = []
}
ohos_prebuilt_static_library示例
import("http://build/ohos.gni")
ohos_prebuilt_static_library("helloworld") {
  source = "file"                  # 一般是后綴為.so的文件
  output = []

  deps = []                        # 部件內模塊依賴
  public_configs = []
  subsystem_name = ""              # 子系統名
  part_name = ""                   # 部件名

  testonly = [boolean]
  visibility = []

  license_file = [string]          # 后綴名是.txt的文件
  license_as_sources = []
}
注意 :只有sources和part_name是必選,其他都是可選的。
Hap模板
hap模板詳見:[ HAP編譯構建指導]
Rust模板
rust模板詳見:[ Rust模塊配置規則和指導]
其他常用模板
ohos_prebuilt_etc示例:
import("http://build/ohos.gni")
ohos_prebuilt_etc("helloworld") {
  # ohos_prebuilt_etc模板最常用屬性:
  source = "file"                          # 指定單個原文件
  module_install_dir = ""                  # 模塊安裝路徑,從system/,vendor/后開始指定
  subsystem_name = ""                      # 子系統名
  part_name = ""                           # 必選,所屬部件名稱
  install_images = []
  relative_install_dir = ""                # 模塊安裝相對路徑,相對于system/etc;如果有module_install_dir配置時,該配置不生效。

  # ohos_prebuilt_etc模板不常用屬性:
  deps = []                                # 部件內模塊依賴
  testonly = [boolean]
  visibility = []
  public_configs = []
  symlink_target_name = [string]
  license_file = [string]
  license_as_sources = []
}
ohos_sa_profile示例:
import("http://build/ohos.gni")
ohos_sa_profile("helloworld") {
  sources = [".xml"]                   # xml文件
  part_name = ""                       # 部件名
  subsystem_name = ""                  # 子系統名
}
注意 :只有sources和part_name是必選,其他都是可選的。
新增并編譯模塊
新建模塊可以分為以下三種情況。主要的添加邏輯如下面的流程圖所示,若沒有子系統則需新建子系統并在該子系統的部件下添加模塊,若沒有部件則需新建部件并在其中添加模塊,否則直接在原有部件中添加模塊即可,需要注意的是芯片解決方案作為特殊部件是沒有對應子系統的。
- 在原有部件中添加一個模塊
- 新建部件并在其中添加模塊
- 新建子系統并在該子系統的部件下添加模塊

在原有部件中添加一個模塊
- 在模塊目錄下配置BUILD.gn,根據模板類型選擇對應的gn模板。
- 修改bundle.json配置文件。
{
   "name": "@ohos/< component_name >",                         # HPM部件英文名稱,格式"@組織/部件名稱"
   "description": "xxxxxxxxxxxxxxxxxxx",                     # 部件功能一句話描述
   "version": "3.1",                                         # 版本號,版本號與OpenHarmony版本號一致
   "license": "MIT",                                         # 部件License
   "publishAs": "code-segment",                              # HPM包的發布方式,當前默認都為code-segment
   "segment": {
       "destPath": "third_party/nghttp2"
   },                                                        # 發布類型為code-segment時為必填項,定義發布類型code-segment的代碼還原路徑(源碼路徑)。
   "dirs": {},                                               # HPM包的目錄結構,字段必填內容可以留空
   "scripts": {},                                            # HPM包定義需要執行的腳本,字段必填,值非必填
   "licensePath": "COPYING",
   "readmePath": {
       "en": "README.rst"
   },
   "component": {                                            # 部件屬性
       "name": "< component_name >",                           # 部件名稱
       "subsystem": ,                                        # 部件所屬子系統
       "syscap": [],                                         # 部件為應用提供的系統能力
       "features": [],                                       # 部件對外的可配置特性列表,一般與build中的sub_component對應,可供產品配置。
       "adapted_system_type": [],                            # 輕量(mini)小型(small)和標準(standard),可以是多個
       "rom": "xxxKB"                                        # ROM基線,沒有基線寫當前值
       "ram": "xxxKB",                                       # RAM基線,沒有基線寫當前值
       "deps": {
           "components": [],                                 # 部件依賴的其他部件
           "third_party": []                                 # 部件依賴的三方開源軟件
       },

       "build": {                                            # 編譯相關配置
           "sub_component": [
               "http://foundation/arkui/napi:napi_packages",      # 原有模塊1
               "http://foundation/arkui/napi:napi_packages_ndk"   # 原有模塊2
               "http://foundation/arkui/napi:new"                 # 新增模塊new
           ],                                                # 部件編譯入口,模塊在此處配置
           "inner_kits": [],                                 # 部件間接口
           "test": []                                        # 部件測試用例編譯入口
       }
   }
}
注意 :無論哪種方式該bundle.json文件均在對應子系統所在文件夾下。
- 成功添加驗證:編譯完成后打包到image中去,生成對應的so文件或者二進制文件。
新建部件并在其中添加一個模塊
- 在模塊目錄下配置BUILD.gn,根據模板類型選擇對應的gn模板。這一步與在原有部件中添加一個模塊的方法基本一致,只需注意該模塊對應BUILD.gn文件中的part_name為新建部件的名稱即可。
- 新建一個bundle.json文件,bundle.json文件均在對應子系統所在文件夾下。
- 在vendor/{product_company}/{product-name}/config.json中添加對應的部件,直接添加到原有部件后即可。
"subsystems": [ { "subsystem": "部件所屬子系統名", "components": [ { "component": "部件名1", "features":[] }, # 子系統下的原有部件1 { "component": "部件名2", "features":[] }, # 子系統下的原有部件2 { "component": "部件名new", "features":[] } # 子系統下的新增部件new ] }, . ] - 成功添加驗證:編譯完成后打包到image中去,生成對應的so文件或者二進制文件。
新建子系統并在該子系統的部件下添加模塊
在模塊目錄下配置BUILD.gn,根據模板類型選擇對應的gn模板。這一步與新建部件并在其中添加模塊中對應的步驟并無區別。
在新建的子系統目錄下每個部件對應的文件夾下創建bundle.json文件,定義部件信息。這一步與新建部件并在其中添加模塊中對應的步驟并無區別。
修改build目錄下的subsystem_config.json文件。
{
 "子系統名1": {                     # 原有子系統1
   "path": "子系統目錄1",
   "name": "子系統名1"
 },
  "子系統名2": {                    # 原有子系統2
   "path": "子系統目錄2",
   "name": "子系統名2"
 },
 "子系統名new": {                   # 新增子系統new
   "path": "子系統目錄new",
   "name": "子系統名new"
 },

}
該文件定義了有哪些子系統以及這些子系統所在文件夾路徑,添加子系統時需要說明子系統path與name,分別表示子系統路徑和子系統名。
在vendor/{product_company}/{product-name}目錄下的產品配置如product-name是hispark_taurus_standard時,在config.json中添加對應的部件,直接添加到原有部件后即可。
"subsystems": [
  {
    "subsystem": "arkui",                      # 原有的子系統名
    "components": [                            # 單個子系統下的所有部件集合
      {
        "component": "ace_engine_standard",    # 原有的部件名
        "features": []
      },
      {
        "component": "napi",                   # 原有的部件名
        "features": []
      }
       {
        "component": "component_new1",         # 原有子系統新增的的部件名component_new1
        "features": []
      }
   ]
  },
  {
    "subsystem": "subsystem_new",              #  新增的子系統名
    "components": [
      {
        "component": "component_new2",         # 新增子系統新增的的部件名component_new2
        "features": []
      }
    ]
  },

 ]
成功添加驗證:編譯完成后打包到image中去,生成對應的so文件或者二進制文件。
編譯模塊
主要有兩種編譯方式,[命令行方式和hb方式],這里以命令行方式為例。
模塊可以使用“--build-target 模塊名"單獨編譯,編譯命令如下:
./build.sh --build-target 模塊名
也可以編譯相應產品,以編譯hispark_taurus_standard為例,編譯命令如下:
./build.sh --product-name hispark_taurus_standard --build-target 模塊名 --ccache
還可以編譯模塊所在的部件:
./build.sh --product-name hispark_taurus_standard --build-target musl --build-target 模塊名 --ccache
創建 BUILD.gn內容如下所示:
import("http://build/ohos.gni") # 導入編譯模板
ohos_executable("helloworld") { # 可執行模塊
sources = [ # 模塊源碼
"src/helloworld.c"
]
include_dirs = [ # 模塊依賴頭文件目錄
"include"
]
cflags = []
cflags_c = []
cflags_cc = []
ldflags = []
configs = []
deps =[] # 部件內部依賴
part_name = "hello" # 所屬部件名稱,必選
install_enable = true # 是否默認安裝(缺省默認不安裝),可選
}
- 新建部件配置規則文件
新建sample/hello/bundle.json文件,添加sample部件描述,創建方法可參考:[部件配置規則]
部件配置規則
部件的bundle.json放在部件源碼的根目錄下。以泛sensor子系統的sensor服務部件為例,部件屬性定義描述文件字段說明如下:
{
    "name": "@ohos/sensor_lite",		                                 # HPM部件英文名稱,格式"@組織/部件名稱"
    "description": "Sensor services",		                             # 部件功能一句話描述
    "version": "3.1",			                                         # 版本號,版本號與OpenHarmony版本號一致
    "license": "MIT",			                                         # 部件License
    "publishAs": "code-segment",		                                 # HPM包的發布方式,當前默認都為code-segment
    "segment": {
        "destPath": ""
    },					                                                 # 發布類型為code-segment時為必填項,定義發布類型code-segment的代碼還原路徑(源碼路徑)
    "dirs": {"base/sensors/sensor_lite"},	                             # HPM包的目錄結構,字段必填內容可以留空
    "scripts": {},			                                             # HPM包定義需要執行的腳本,字段必填,值非必填
    "licensePath": "COPYING",
    "readmePath": {
        "en": "README.rst"
    },
    "component": {			                                             # 部件屬性
        "name": "sensor_lite",			                                 # 部件名稱
        "subsystem": "",		                                         # 部件所屬子系統
        "syscap": [],				                                     # 部件為應用提供的系統能力
        "features": [],                                                  # 部件對外的可配置特性列表,一般與build中的sub_component對應,可供產品配置
        "adapted_system_type": [],		                                 # 輕量(mini)小型(small)和標準(standard),可以是多個
        "rom": "92KB",                                                   # 部件ROM值
        "ram": "~200KB",                                                 # 部件RAM估值
        "deps": {
        "components": [                                                  # 部件依賴的其他部件
          "samgr_lite",
          "ipc_lite"
        ],
        "third_party": [                                                 # 部件依賴的三方開源軟件
          "bounds_checking_function"
        ],
        "hisysevent_config": []                                          # 部件HiSysEvent打點配置文件編譯入口
      }
        "build": {				                                         # 編譯相關配置
            "sub_component": [
                ""//base/sensors/sensor_lite/services:sensor_service"",  # 部件編譯入口
            ],			                                                 # 部件編譯入口,模塊在此處配置
            "inner_kits": [],						                     # 部件間接口
            "test": []							                         # 部件測試用例編譯入口
        }
    }
 }
注意 :lite上舊的部件在build/lite/components目錄下對應子系統的json文件中,路徑規則為: {領域}/{子系統}/{部件} ,部件目錄樹規則如下:
component
├── interfaces
│   ├── innerkits  # 系統內接口,部件間使用
│   └── kits       # 應用接口,應用開發者使用
├── frameworks     # framework實現
├── services       # service實現
└── BUILD.gn       # 部件編譯腳本
部件配置中需要配置部件的名稱、源碼路徑、功能簡介、是否必選、編譯目標、RAM、ROM、編譯輸出、已適配的內核、可配置的特性和依賴等屬性定義。
注意 :部件配置中HiSysEvent打點配置文件使用說明,請參考文檔[HiSysEvent打點配置]。
新增部件時需要在對應子系統json文件中添加相應的部件定義。產品所配置的部件必須在某個子系統中被定義過,否則會校驗失敗。
新增并編譯部件
添加部件。 本節以添加一個自定義的部件為例,描述如何編譯部件,編譯庫、編譯可執行文件等。
示例部件partA由feature1、feature2和feature3組成,feature1的編譯目標為一個動態庫,feature2的目標為一個可執行程序,feature3的目標為一個etc配置文件。
示例部件partA的配置需要添加到一個子系統中,本次示例將添加到subsystem_examples子系統中(subsystem_examples子系統定義在test/examples/目錄)。
示例部件partA的完整目錄結構如下:test/examples/partA ├── feature1 │ ├── BUILD.gn │ ├── include │ │ └── helloworld1.h │ └── src │ └── helloworld1.cpp ├── feature2 │ ├── BUILD.gn │ ├── include │ │ └── helloworld2.h │ └── src │ └── helloworld2.cpp └── feature3 ├── BUILD.gn └── src └── config.conf示例1:編寫動態庫gn腳本test/examples/partA/feature1/BUILD.gn,示例如下:
config("helloworld_lib_config") {
 include_dirs = [ "include" ]
}

ohos_shared_library("helloworld_lib") {
  sources = [
    "include/helloworld1.h",
    "src/helloworld1.cpp",
  ]
  public_configs = [ ":helloworld_lib_config" ]
  part_name = "partA"
}
示例2:編寫可執行文件gn腳本test/examples/partA/feature2/BUILD.gn,示例如下:
ohos_executable("helloworld_bin") {
  sources = [
    "src/helloworld2.cpp"
  ]
  include_dirs = [ "include" ]
  deps = [                                # 依賴部件內模塊
    "../feature1:helloworld_lib"
  ]
  external_deps = [ "partB:module1" ]     # (可選)如果有跨部件的依賴,格式為“部件名:模塊名”
  install_enable = true                   # 可執行程序缺省不安裝,需要安裝時需要指定
  part_name = "partA"
}
示例3:編寫etc模塊gn腳本test/examples/partA/feature3/BUILD.gn,示例如下:
ohos_prebuilt_etc("feature3_etc") {
  source = "src/config.conf"
  relative_install_dir = "init"    #可選,模塊安裝相對路徑,相對于默認安裝路徑;默認在/system/etc目錄
  part_name = "partA"
}
示例4:在部件的bundle.json中添加模塊配置:test/examples/bundle.json。每個部件都有一個bundle.json配置文件,在部件的根目錄下。示例見:[部件的bundle.json]
將部件添加到產品配置中。 在產品的配置中添加部件,產品對應的配置文件://vendor/{product_company}/{product-name}/config.json。下面以vendor/hisilicon/hispark_taurus_standard/config.json為例:
{
    "product_name": "hispark_taurus_standard",
    "device_company": "hisilicon",
    "device_build_path": "device/board/hisilicon/hispark_taurus/linux",
    "target_cpu": "arm",
    "type": "standard",
    "version": "3.0",
    "board": "hispark_taurus",
    "inherit": [ "productdefine/common/base/standard_system.json",
                "productdefine/common/inherit/ipcamera.json"
    ],
    "enable_ramdisk": true,
    "subsystems": [
      {
        "subsystem": "subsystem_examples",                              # 部件所屬子系統
        "components": [
          {
            "component": "partA",                                       # 部件名稱
            "features": []                                              # 部件對外的可配置特性列表
          }
        ]
      },
    ······
  }
從中可以看出產品名稱、芯片廠家等;inherit指出依賴的通用組件;subsystems指出通用組件以外的部件。
在產品配置文件中添加 "subsystem_examples:partA",表示該產品中會編譯并打包partA到版本中。
編譯。 主要有兩種編譯方式,[命令行方式和hb方式],下面以命令行方式為例:
部件可以使用"--build-target 部件名"進行單獨編譯,以編譯產品hispark_taurus_standard的musl部件為例,編譯命令如下:./build.sh --product-name hispark_taurus_standard --build-target musl --ccache也可以編譯相應產品,以編譯hispark_taurus_standard為例,編譯命令如下:
./build.sh --product-name hispark_taurus_standard --ccache編譯輸出。 編譯所生成的文件都歸檔在out/hispark_taurus/目錄下,結果鏡像輸出在 out/hispark_taurus/packages/phone/images/ 目錄下。
bundle.json內容如下所示。{ "name": "@ohos/hello", "description": "Hello world example.", "version": "3.1", "license": "Apache License 2.0", "publishAs": "code-segment", "segment": { "destPath": "sample/hello" }, "dirs": {}, "scripts": {}, "component": { "name": "hello", "subsystem": "sample", "syscap": [], "features": [], "adapted_system_type": [ "mini", "small", "standard" ], "rom": "10KB", "ram": "10KB", "deps": { "components": [], "third_party": [] }, "build": { "sub_component": [ "http://sample/hello:helloworld" ], "inner_kits": [], "test": [] } } }bundle.json文件包含兩個部分,第一部分描述該部件所屬子系統的信息,第二部分component則定義該部件構建相關配置。添加的時候需要指明該部件包含的模塊sub_component,假如有提供給其它部件的接口,需要在inner_kits中說明,假如有測試用例,需要在test中說明,inner_kits與test沒有也可以不添加。
修改子系統配置文件。
在build/subsystem_config.json中添加新建的子系統的配置。修改方法可參考:[子系統配置規則]
子系統配置規則
通過build倉下的subsystem_config.json可以查看所有子系統的配置規則。
{
  "arkui": {
    "path": "foundation/arkui",      # 路徑
    "name": "arkui"                  # 子系統名
  },
  "ai": {
    "path": "foundation/ai",
    "name": "ai"
  },
  "account": {
    "path": "base/account",
    "name": "account"
  },
  "distributeddatamgr": {
    "path": "foundation/distributeddatamgr",
    "name": "distributeddatamgr"
  },
  "security": {
    "path": "base/security",
    "name": "security"
  },
  ...
}
子系統的配置規則主要是在build/subsystem_config.json中指定子系統的路徑和子系統名稱。
新增子系統的配置如下所示。
"sample": {
"path": "sample",
"name": "sample"
},
修改產品配置文件。
說明: OpenHarmony-v3.2-Beta2之前版本,RK3568的產品配置文件為productdefine/common/products/rk3568.json;從OpenHarmony-v3.2-Beta2版本開始,RK3568的產品配置文件為vendor/hihope/rk3568/config.json。
- 3.2-Beta2之前版本
在productdefine/common/products/rk3568.json中添加對應的hello部件,直接添加到原有部件后即可。"usb:usb_manager_native":{}, "applications:prebuilt_hap":{}, "sample:hello":{}, "wpa_supplicant-2.9:wpa_supplicant-2.9":{}, - 3.2-Beta2及之后版本
在vendor/hihope/rk3568/config.json中添加對應的hello部件,直接添加到原有部件后即可。{ "subsystem": "sample", "components": [ { "component": "hello", "features": [] } ] },
- 3.2-Beta2之前版本
審核編輯 黃宇
-
開發板
+關注
關注
25文章
5613瀏覽量
103434 -
鴻蒙
+關注
關注
59文章
2569瀏覽量
43880 -
HarmonyOS
+關注
關注
80文章
2134瀏覽量
32473 -
OpenHarmony
+關注
關注
29文章
3846瀏覽量
18323
發布評論請先 登錄
鴻蒙OpenHarmony【標準系統編譯】 (基于RK3568開發板)
鴻蒙OpenHarmony【標準系統 編寫“Hello World”程序】(基于RK3568開發板)
北京迅為RK3568開發板OpenHarmony系統南向驅動開發內核HDF驅動框架架構

鴻蒙OpenHarmony南向/北向快速開發教程-迅為RK3568開發板
迅為RK3568開發板鴻蒙OpenHarmony系統固件燒寫步驟
如何在RK3568開發板上面運行OpenHarmony標準系統
標準系統:KHDVK-3568A智慧屏開發套件(RK3568)
RK3568開發板上絲滑體驗OpenHarmony標準系統

OpenHarmony:全流程講解如何編寫ADC平臺驅動以及應用程序

OpenHarmony:如何使用HDF平臺驅動控制PWM
OpenHarmony:全流程講解如何編寫RTC平臺驅動以及應用程序
瑞芯微RK3568鴻蒙開發板OpenHarmony系統修改cfg文件權限方法

基于ArkTS語言的OpenHarmony APP應用開發:HelloOpenharmony
【北京迅為】iTOP-RK3568開發板鴻蒙OpenHarmony系統南向驅動開發實操-HDF驅動配置UART


 工商網監
工商網監
評論